Setting up Plausible Analytics takes less time than making a cup of coffee. I’ve installed it on dozens of client sites, and the entire process—from signup to seeing your first visitors—takes about 10 minutes.
In this step-by-step guide, I’ll show you exactly how to set up Plausible Analytics on your website, whether you’re using WordPress, a static site, or any other platform. No technical expertise required.
By the end, you’ll have privacy-friendly analytics running on your site without cookies, consent banners, or complex configuration.
What You’ll Need
Before we start, make sure you have:
- Access to your website’s HTML or CMS (WordPress, Webflow, etc.)
- An email address for your Plausible account
- About 10 minutes of time
That’s it. No server setup, no database configuration, no technical prerequisites.
Step 1: Create Your Plausible Account
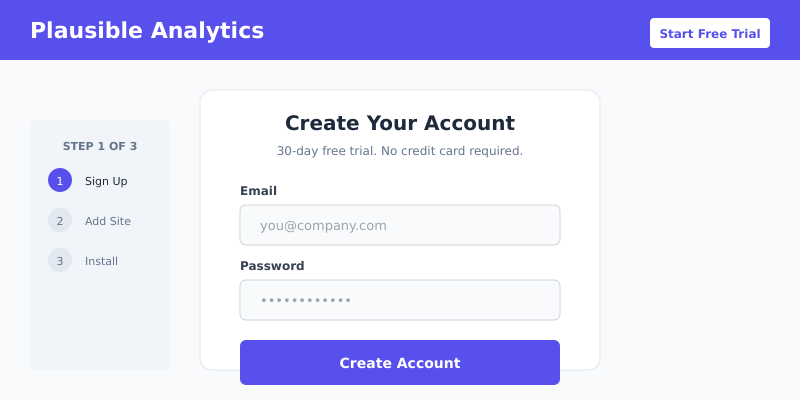
Head to plausible.io and click “Start free trial.” Plausible offers a 30-day free trial with no credit card required—plenty of time to evaluate whether it meets your needs.
Fill in your email and create a password. You’ll receive a verification email within seconds. Click the link to activate your account.
Pro tip: Use your business email rather than a personal one. This makes it easier to transfer ownership or add team members later.
Step 2: Add Your Website
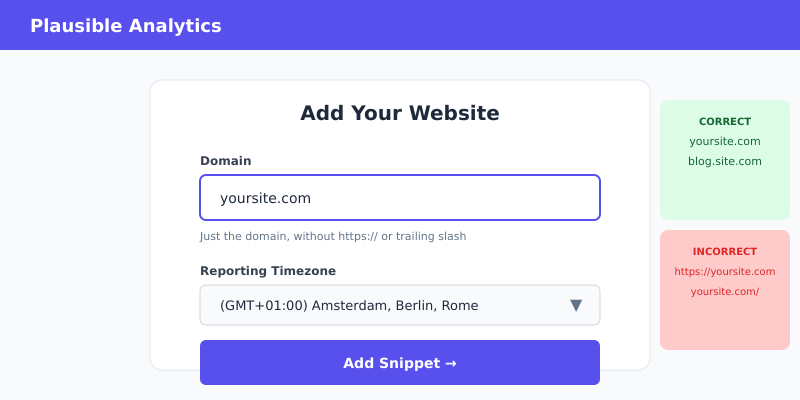
After logging in, you’ll be prompted to add your first website. Enter your domain name—just the domain, without https:// or trailing slashes.
Examples:
- Correct:
yoursite.com - Incorrect:
https://yoursite.com/
Select your timezone. This determines how Plausible groups your daily statistics. Choose the timezone where most of your audience is located, or your business timezone.
Click “Add snippet” to proceed to the installation step.
Step 3: Install the Tracking Script
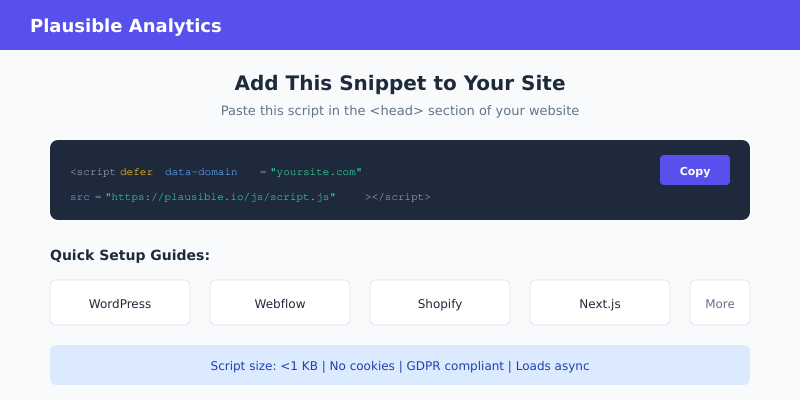
Plausible gives you a small JavaScript snippet to add to your website. It looks like this:
<script defer data-domain="yoursite.com" src="https://plausible.io/js/script.js"></script>This script needs to go in the <head> section of your HTML, on every page you want to track. How you do this depends on your platform.
For WordPress Sites
The easiest method is using the official Plausible WordPress plugin:
- Go to Plugins → Add New in your WordPress admin
- Search for “Plausible Analytics”
- Install and activate the plugin
- Go to Settings → Plausible Analytics
- Enter your domain name and save
The plugin handles everything automatically—no code editing required.
For Static HTML Sites
Open your HTML file and paste the script inside the <head> tag:
<!DOCTYPE html>
<html>
<head>
    <title>Your Page Title</title>
    <script defer data-domain="yoursite.com" src="https://plausible.io/js/script.js"></script>
</head>
<body>
    ...
</body>
</html>
For Other Platforms
Most website builders have a “custom code” or “header injection” feature:
- Webflow: Project Settings → Custom Code → Head Code
- Squarespace: Settings → Advanced → Code Injection → Header
- Shopify: Online Store → Themes → Edit Code → theme.liquid
- Ghost: Settings → Code Injection → Site Header
- Wix: Settings → Custom Code → Head
Paste the Plausible script in the appropriate location and save.
Step 4: Verify Installation
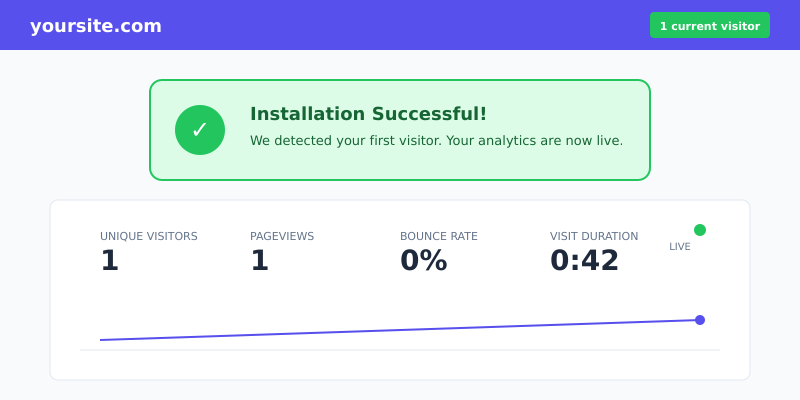
After adding the script, visit your website in a new browser tab. Then check your Plausible dashboard—you should see “1 current visitor” within seconds.
If you don’t see any data:
- Check for typos — Make sure the domain in your script matches exactly what you entered in Plausible
- Clear your cache — Your browser might be showing a cached version without the script
- Disable ad blockers temporarily — Some aggressive ad blockers may block the script
- View page source — Right-click your page, select “View Page Source,” and search for “plausible” to confirm the script is present
Step 5: Set Up Goals (Optional but Recommended)
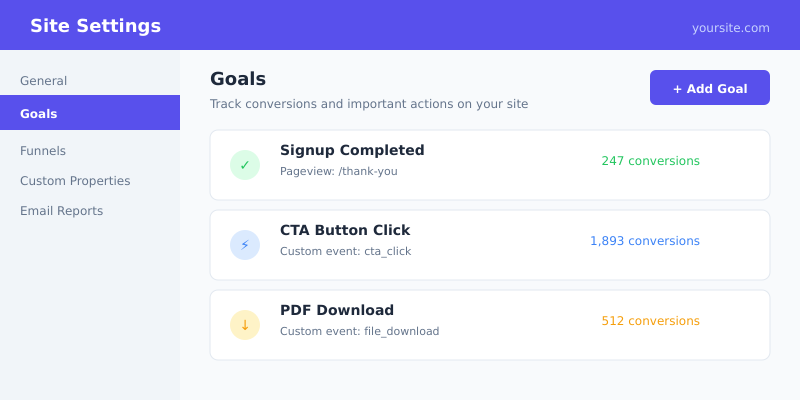
Goals let you track specific actions like signups, purchases, or button clicks. I recommend setting these up from day one—you’ll thank yourself later when you have conversion data.
Pageview Goals
Track when visitors reach specific pages (like a “thank you” page after signup):
- Go to your site settings in Plausible
- Click “Goals” in the sidebar
- Click “Add Goal”
- Select “Pageview”
- Enter the page path (e.g.,
/thank-you)
Custom Event Goals
Track button clicks, form submissions, or any custom interaction:
- Add goal in Plausible dashboard with a name like “Signup Button Click”
- Add JavaScript to your button:
<button onclick="plausible('Signup Button Click')">Sign Up</button>Or for non-inline JavaScript:
document.getElementById('signup-btn').addEventListener('click', function() {
    plausible('Signup Button Click');
});
Step 6: Enable Additional Features
Plausible offers optional script extensions for enhanced tracking. To use them, modify your script src:
Outbound Link Tracking
Track when visitors click links to external sites:
<script defer data-domain="yoursite.com" src="https://plausible.io/js/script.outbound-links.js"></script>File Download Tracking
Track PDF, ZIP, and other file downloads:
<script defer data-domain="yoursite.com" src="https://plausible.io/js/script.file-downloads.js"></script>Combined Extensions
You can combine multiple extensions:
<script defer data-domain="yoursite.com" src="https://plausible.io/js/script.outbound-links.file-downloads.js"></script>Common Mistakes to Avoid
After setting up Plausible on many sites, here are the mistakes I see most often:
1. Wrong Domain Format
The domain in your script must match exactly what you registered. www.yoursite.com and yoursite.com are treated as different sites. Pick one and be consistent.
2. Script Not on All Pages
If you’re manually adding the script, make sure it’s on every page—not just your homepage. Use a template or include file to ensure consistency.
3. Forgetting to Remove GA4
If you’re switching from Google Analytics, remember to remove the old tracking code. Running both wastes bandwidth and can confuse your data comparison.
4. Not Setting Up Goals Early
Goals don’t track retroactively. If you wait three months to add goal tracking, you won’t have conversion data for those three months. Set them up now.
5. Ignoring UTM Parameters
Plausible tracks UTM parameters automatically. Use them in your marketing links to see exactly which campaigns drive traffic. Format: ?utm_source=twitter&utm_medium=social&utm_campaign=launch
Frequently Asked Questions
How long until I see data in Plausible?
Data appears in real-time. As soon as someone visits your site with the script installed, you’ll see them in your dashboard. There’s no processing delay like with Google Analytics.
Does Plausible work with single-page applications (SPAs)?
Yes. Plausible automatically tracks navigation in SPAs built with React, Vue, Next.js, and similar frameworks. No additional configuration needed for most setups.
Can I track multiple domains with one account?
Yes. You can add unlimited websites to your Plausible account. Each domain has its own dashboard and tracking snippet. Pricing is based on total pageviews across all sites.
Will Plausible slow down my website?
No. The Plausible script is under 1 KB—about 45 times smaller than Google Analytics. It loads asynchronously and won’t block your page rendering. Most sites see improved performance after switching from GA4.
Do I need a cookie consent banner with Plausible?
No. Plausible doesn’t use cookies or collect personal data, so no consent is required under GDPR, CCPA, or PECR. This is one of the main reasons people switch to Plausible.
What’s Next?
You now have privacy-friendly analytics running on your website. Here are some next steps to get more value from Plausible:
- Share your dashboard — Create a public or password-protected link for stakeholders
- Set up email reports — Get weekly or monthly traffic summaries in your inbox
- Connect Google Search Console — See which search queries bring visitors to your site
- Explore the API — Build custom dashboards or integrate analytics into your app
The whole setup takes about 10 minutes, but you’ll benefit from cleaner, faster, more ethical analytics for years to come. If you’re still using Google Analytics, there’s never been a better time to make the switch.